
In 2016 TIBCO announced Project Flogo as an ultra lightweight integration engine — up to 20 to 50 times lighter than Node.js and Java Dropwizard. It’s open source and easily extensible, which means you want to make sure the activities you build keep working after each check-in. The question is straightforward: how do you test your activities every time code is pushed to Git?
Depending on where your source code lives and how public it is, you have a few options. This post covers Jenkins for a local git server and Travis-CI for GitHub repos.
Project structure #
Before we start, here’s my project layout since some of the scripts depend on it. I structure my Flogo extensions by category with separate folders for activities and triggers:
├───<Repo root>
│   └───activity
|   |   └───<my-activity>
|   |       |───<all my files>
│   └───trigger
|       └───<my-trigger>
|           |───<all my files>
A real example — my repository is called Concat:
├───Concat
│   └───activity
|       └───my-activity
|           |───activity.go
|           |───activity.json
|           |───activity_test.go
Jenkins #
Installing the Go Plugin #
If you just installed Jenkins, Go probably wasn’t on your radar. The Go Plugin makes it easy. Go to Manage Jenkins -> Manage Plugins, search for Go Plugin on the Available tab, and select Download now and install after restart.
After the restart, go to Manage Jenkins -> Global Tool Configuration and find the Go section. Click Go installations…, give it a name (this helps you find it later), check Install automatically, and select your version. Click Apply then Save.
Configuring the build job #
Create a New Item and select a Freestyle project. In my case, since I have a category with multiple activities, I use a parameterized project.
I’ll assume you know how to configure source code management, so I’ll skip that part.
In the Build Environment section, check two boxes:
Delete workspace before build starts: Always start with fresh code.Set up Go programming language tools: Pick the Go version you configured earlier.
In the Build section add a shell command build step:
## Go get the Project Flogo dependencies
go get github.com/TIBCOSoftware/flogo-lib/...
go get github.com/TIBCOSoftware/flogo-contrib/...

## Go get the test dependencies
go get github.com/stretchr/testify/assert

## Find all the activities and run the test cases for them
for path in ./activity/*; do
    [ -d "${path}" ] || continue # if not a directory, skip
    dirname="$(basename "${path}")"
    ## Run the test cases
    go test ./activity/$dirname
done

## Create a release zipfile that strips out all non-required files
zip -r v${BUILD_NUMBER}-${JOB_NAME}.zip ./activity/ ./connector/
If your test cases succeed, so does your build — otherwise you’ll need to tweak your code :-)
Travis-CI #
For GitHub-hosted code, Travis-CI provides continuous integration with automated testing, building, and deploying. They have a solid Getting Started guide, so I’ll skip the initial setup.
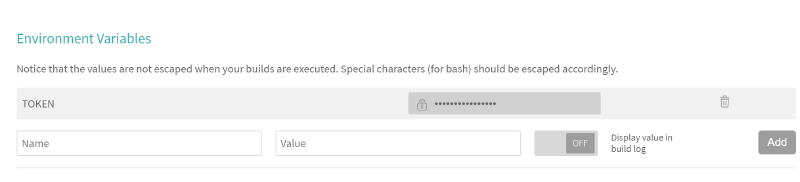
One requirement I had: every code update should create a new release. For that you need a Personal Access Token from GitHub. Don’t put that token in your repo files — add it as an Environment Variable in Travis-CI instead. Travis hides the value in logs by default. Here’s how mine looks, with a variable called TOKEN:
The only additional file you need in your repo is .travis.yml:
## We don't need elevated privileges
sudo: false

## The language should be Go and we'll use version 1.8.3
language: go
go:
- 1.8.3

## The below statement skips all branches that start with a 'v' (e.g. v1) so that we can have working branches that get committed.
branches:
  except:
  - /^v.*/

## Install the dependencies we need
install:
- go get github.com/TIBCOSoftware/flogo-lib/...
- go get github.com/TIBCOSoftware/flogo-contrib/...
- go get github.com/stretchr/testify/assert

## The script is the same as it was in Jenkins, though joined to be a single line
script:
- for path in ./activity/*; do [ -d "${path}" ] || continue; dirname="$(basename "${path}")"; go test ./activity/$dirname; done; zip -r release.zip ./activity/ ./connector/

## After a successful build, we want to create a new release on GitHub in case the build was tagged. This was we can have more control over when a build is an actual release. The release will have the same name as the tag
deploy:
  provider: releases
  api_key: $TOKEN
  file: "release.zip"
  skip_cleanup: true
  on:
    tags: true
Wrapping up #
Both Jenkins and Travis-CI make it straightforward to set up continuous testing and delivery for Flogo activities. Check out Project Flogo and let me know what you’ve built!